Use Canva to create all your social media
Publication Date: October 9, 2024
A small business owner wears many hats when they are first launching their business. In this day and age, social media plays a pivotal role in the success of both small and large businesses. Many small business owners find creating content for social media to be time consuming.
The intended audience for this paper is busy small business owners. It describes the use of Canva in creating social media posts for small businesses and breaks the process down into steps for convenience.
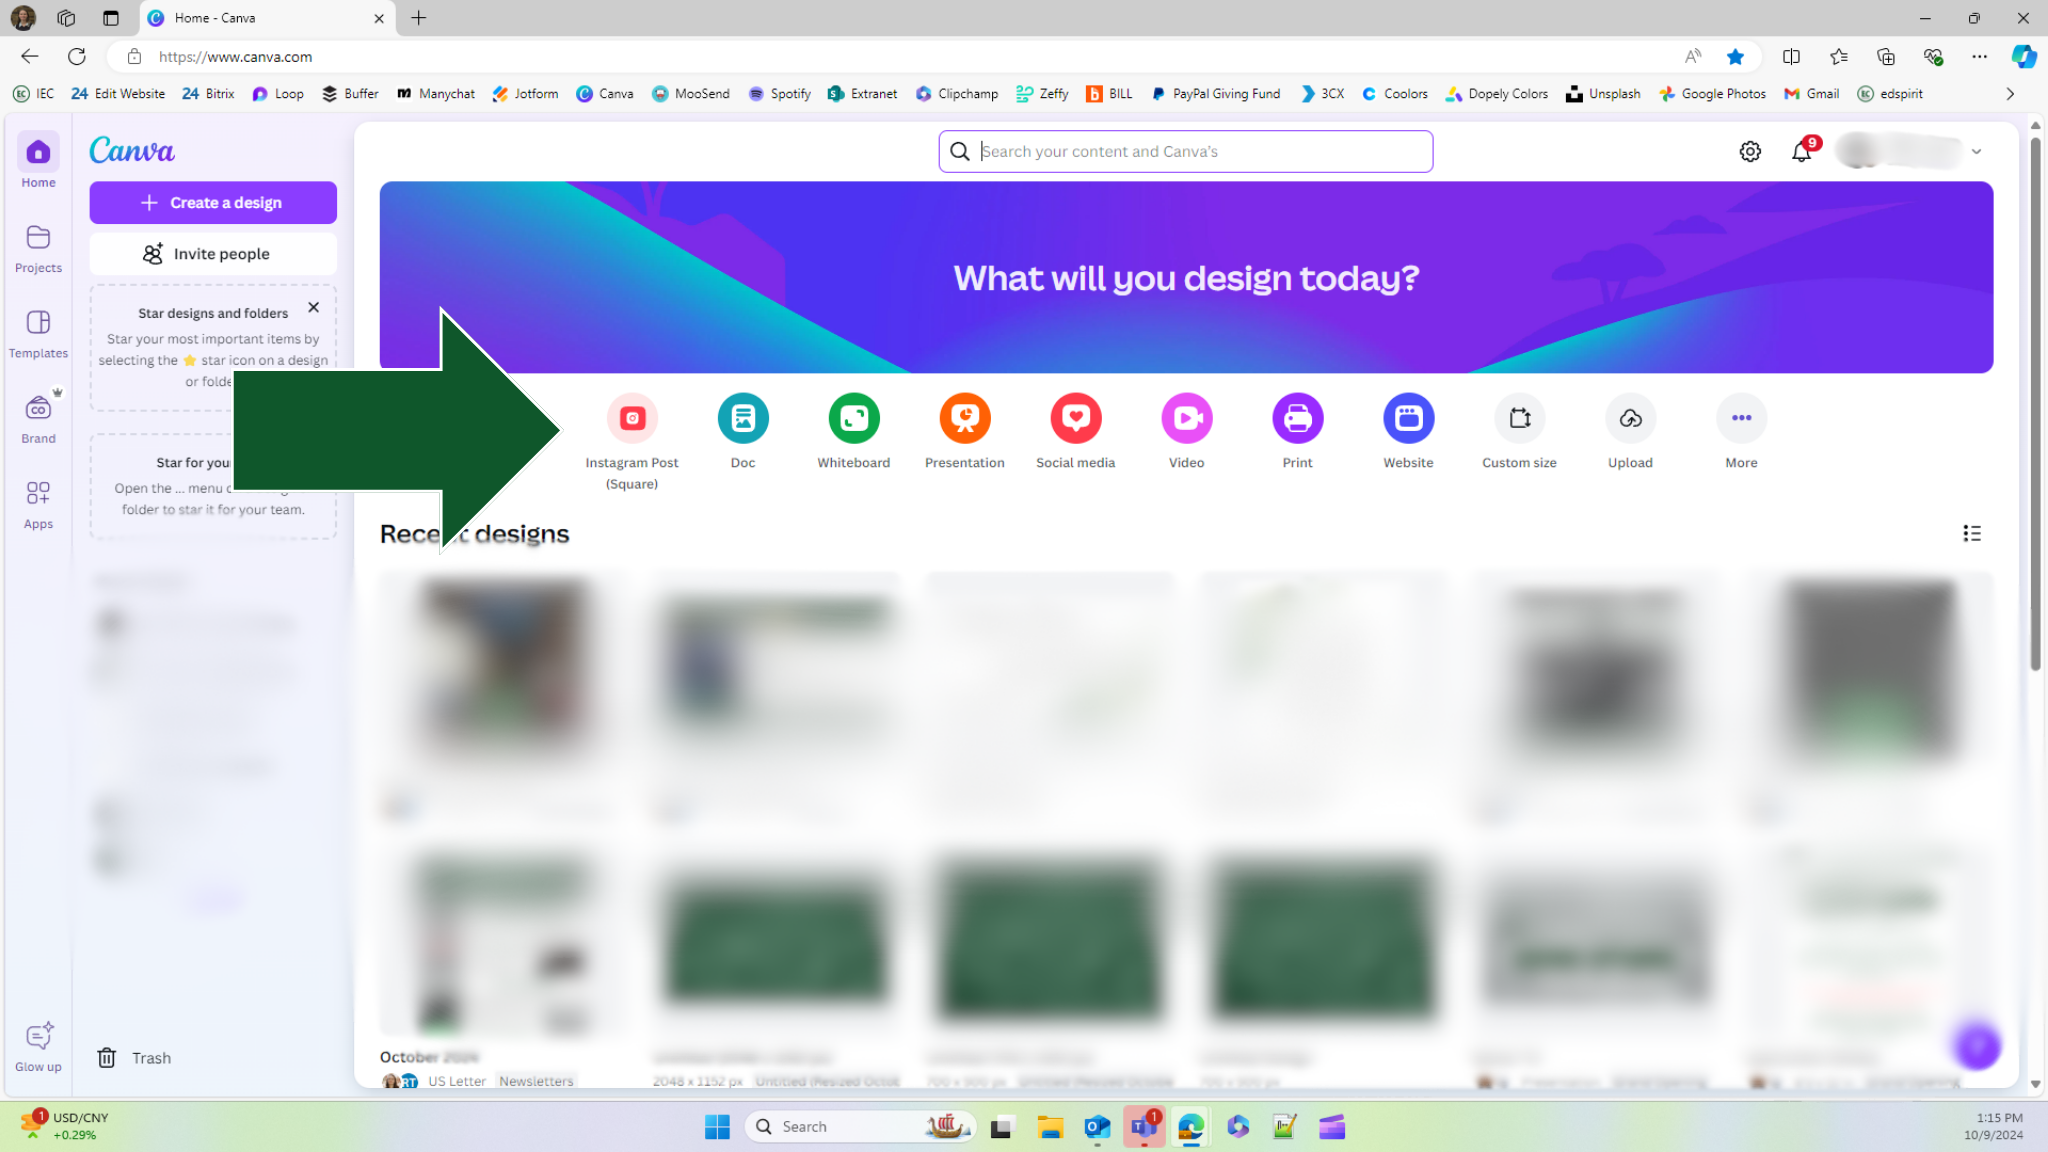
1. Select what you are designing.
Instagram Post (square) is a practical option due to its compatibility with various social media platforms, allowing for the creation of a single design that can be utilized across multiple channels. However, there are options for most every kind of social media post, including Facebook posts, LinkedIn background photos, Instagram reels, and more.
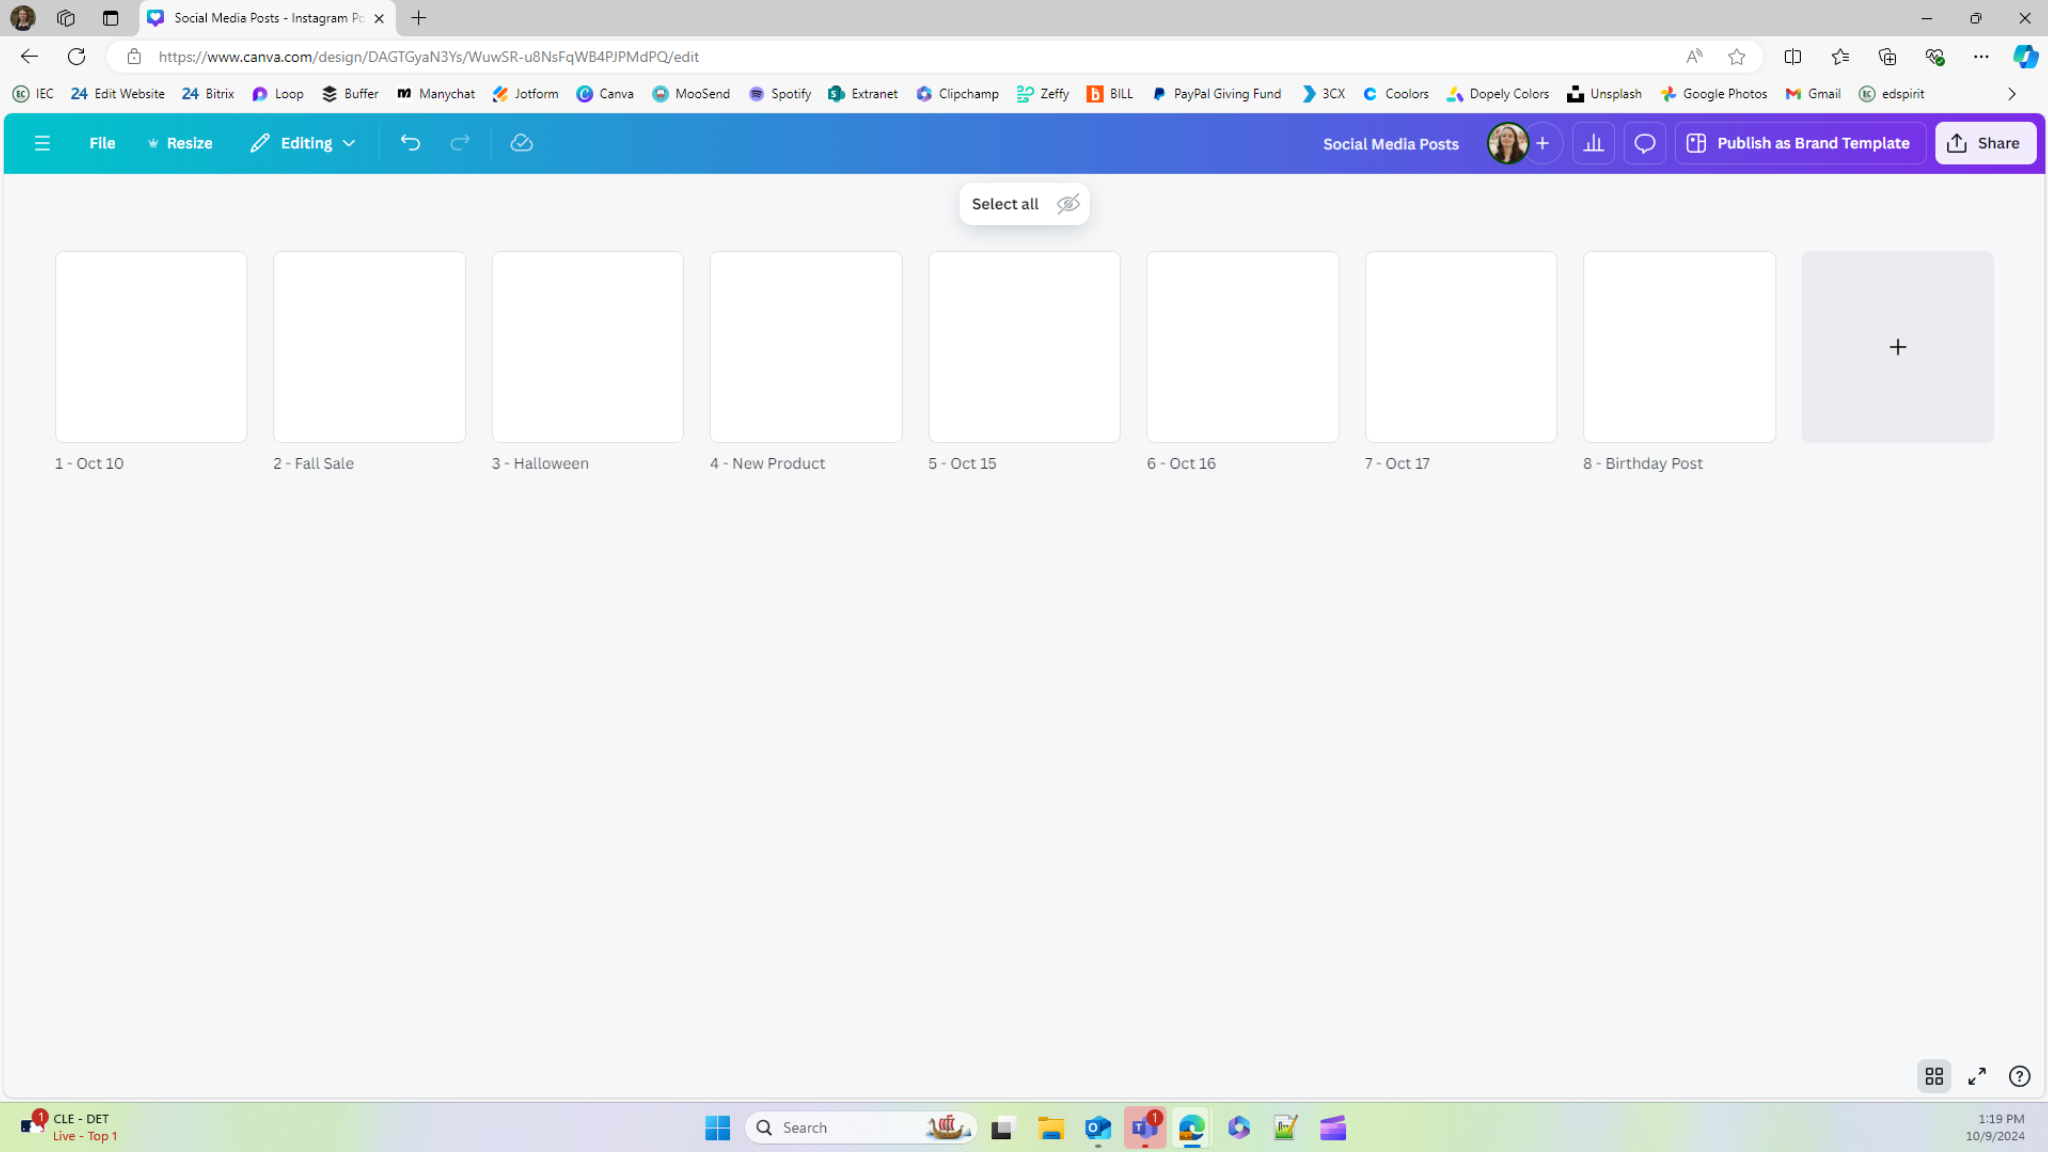
2. Give your Design a name.
It is advisable to keep all posts in one (or just a few) Design(s); therefore, assigning a general name, such as "Social Media Posts," to the Design is recommended. Additional Pages can be added to the Design as needed, with each Page labeled more specifically, such as “October 10” or “Fall Sale,” for clarity.

3. Add as many Pages as posts you are going to create.
Pages can be added at any time.
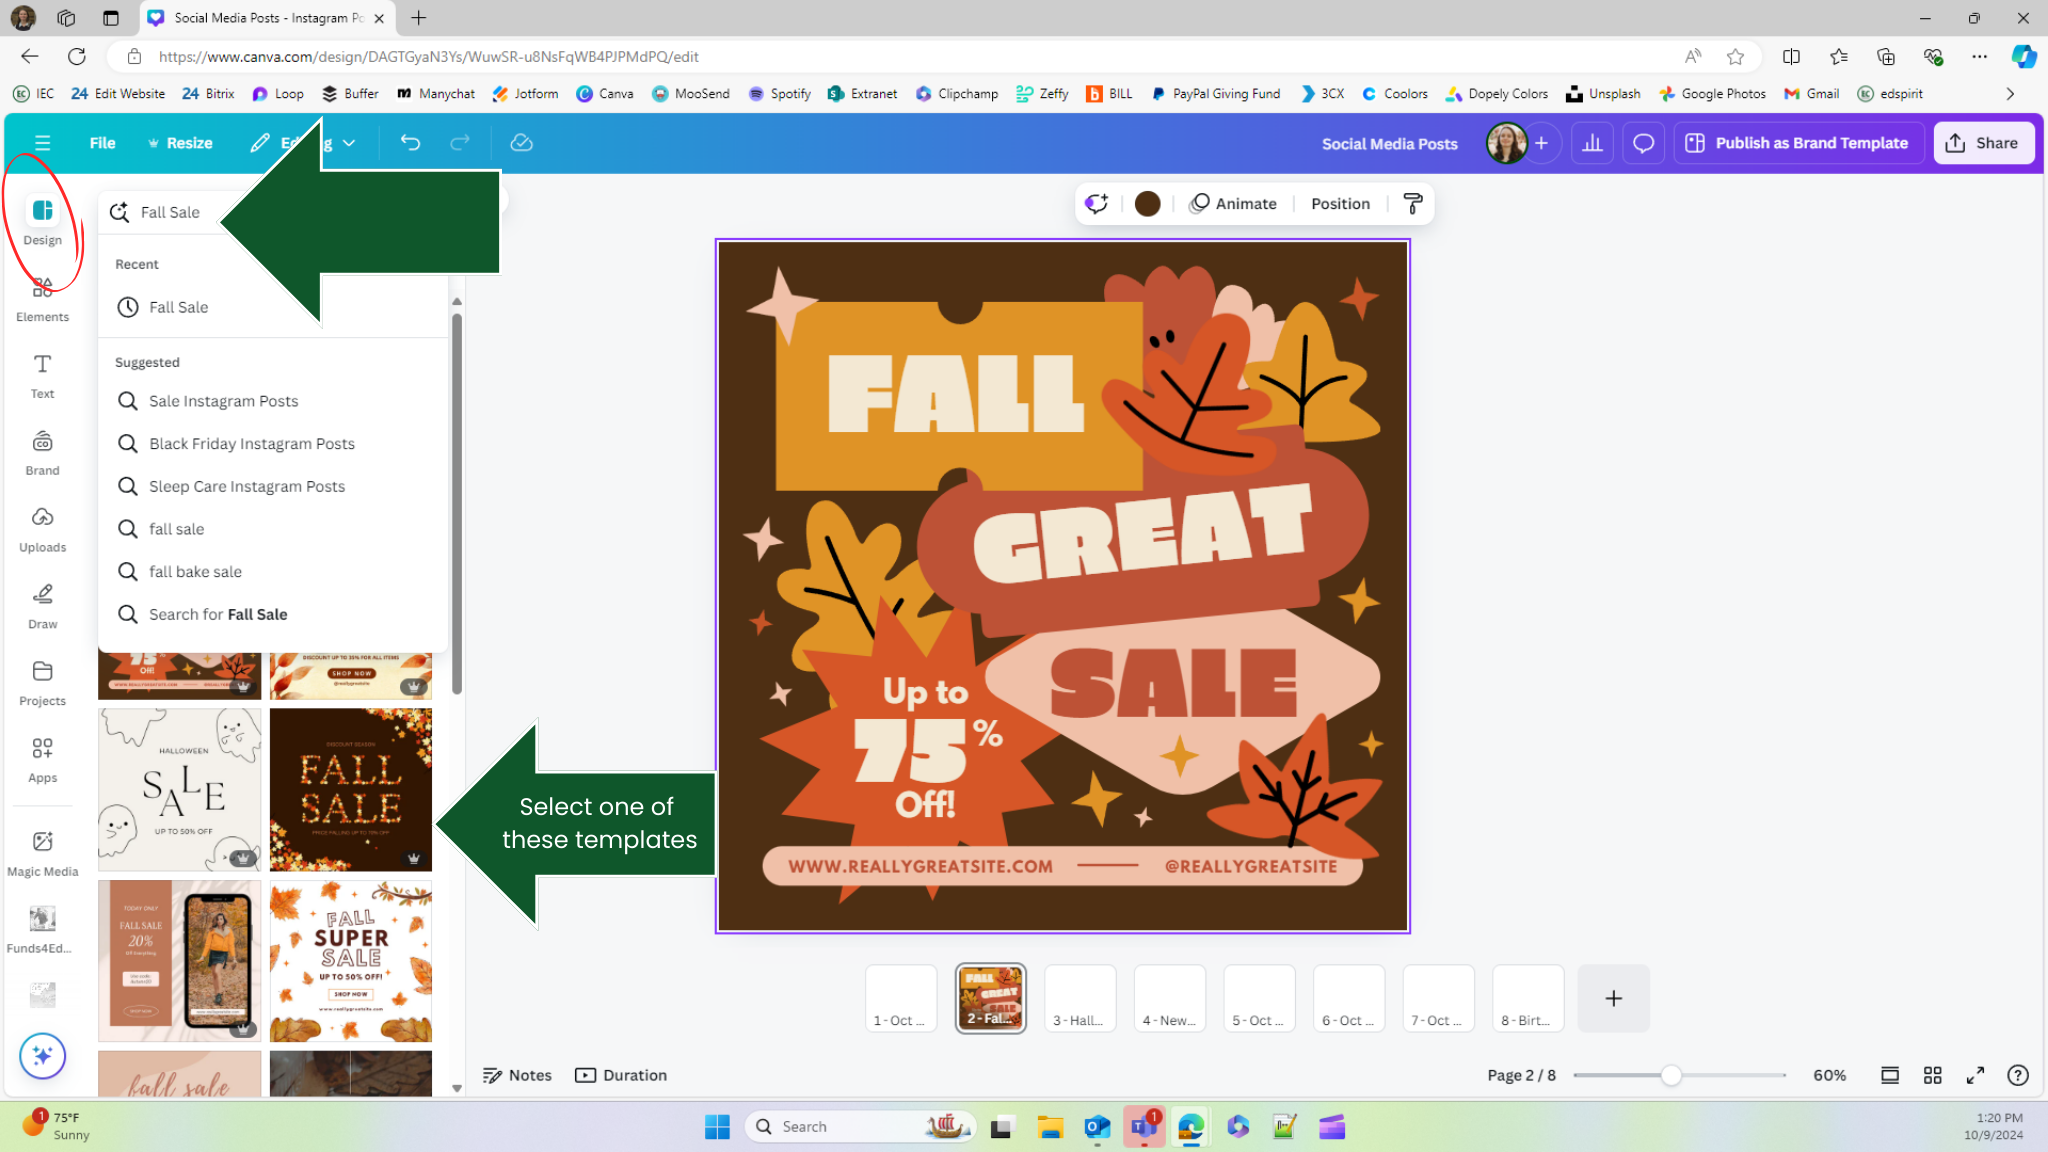
4. Start designing your post by using the “Design” tab on the left bar.
In the search bar, type what kind of post you want to make. For example, “Fall Sale” or “Spring Event”. Use the results as a template for your post.
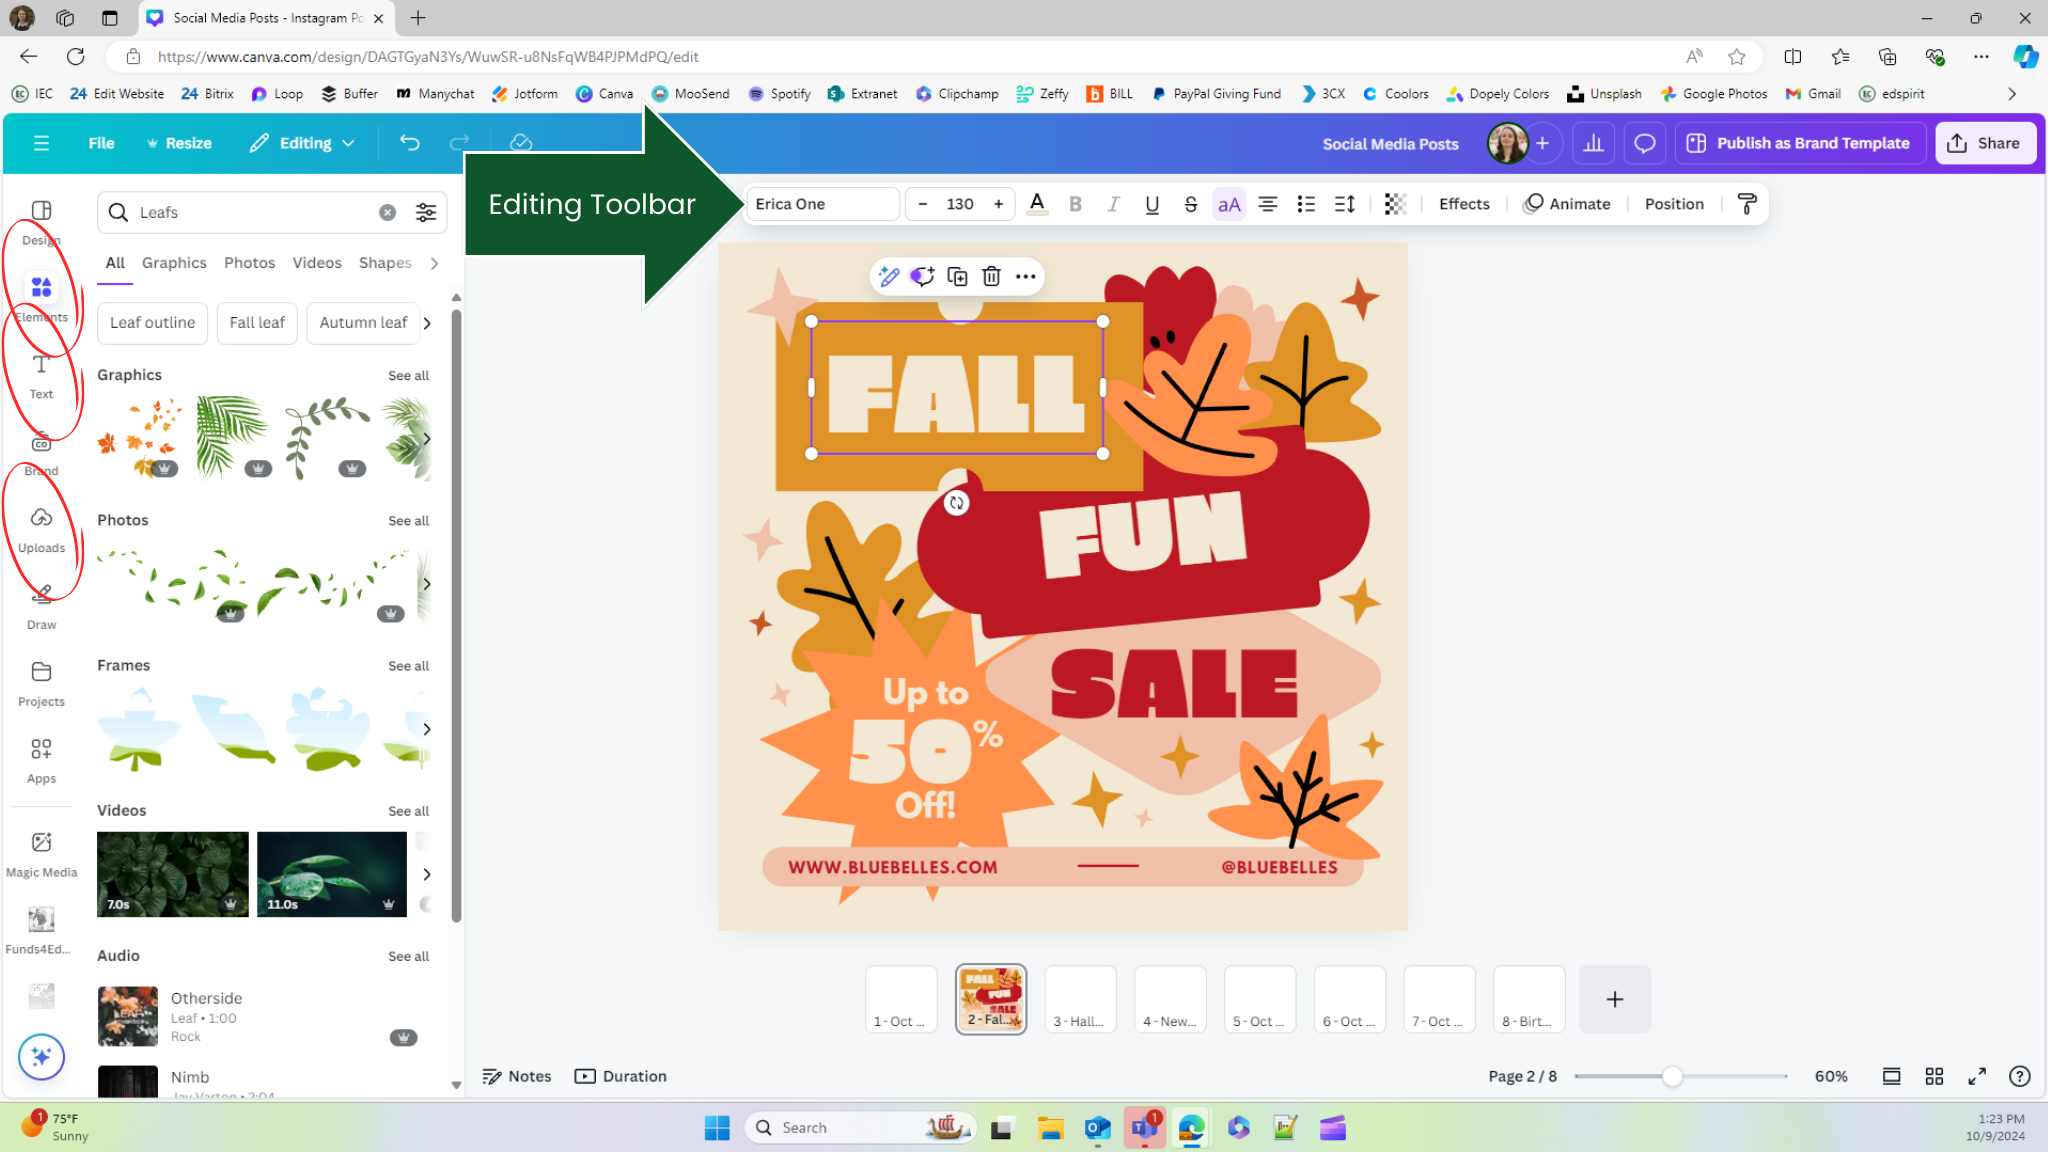
5. Customize the template you choose.
Canva offers extensive customization options for nearly every design element. Users can modify colors on most graphics, as well as adjust text size, color, boldness, and content. Shapes can be resized or repositioned as needed. It is advisable to modify the colors and fonts of any selected template to align with your business's branding. Additionally, users can incorporate different images or graphics by selecting the "Elements" tab from the left sidebar, where options such as shapes, graphics, stickers, photos, videos, audio, charts, and frames are available. Text boxes are located under a separate tab on the left, and upon selecting any element or text box, an editing toolbar will appear at the top of the screen, offering a variety of customization options. Furthermore, users can upload personal photos, audio, or video through the “Uploads” tab.
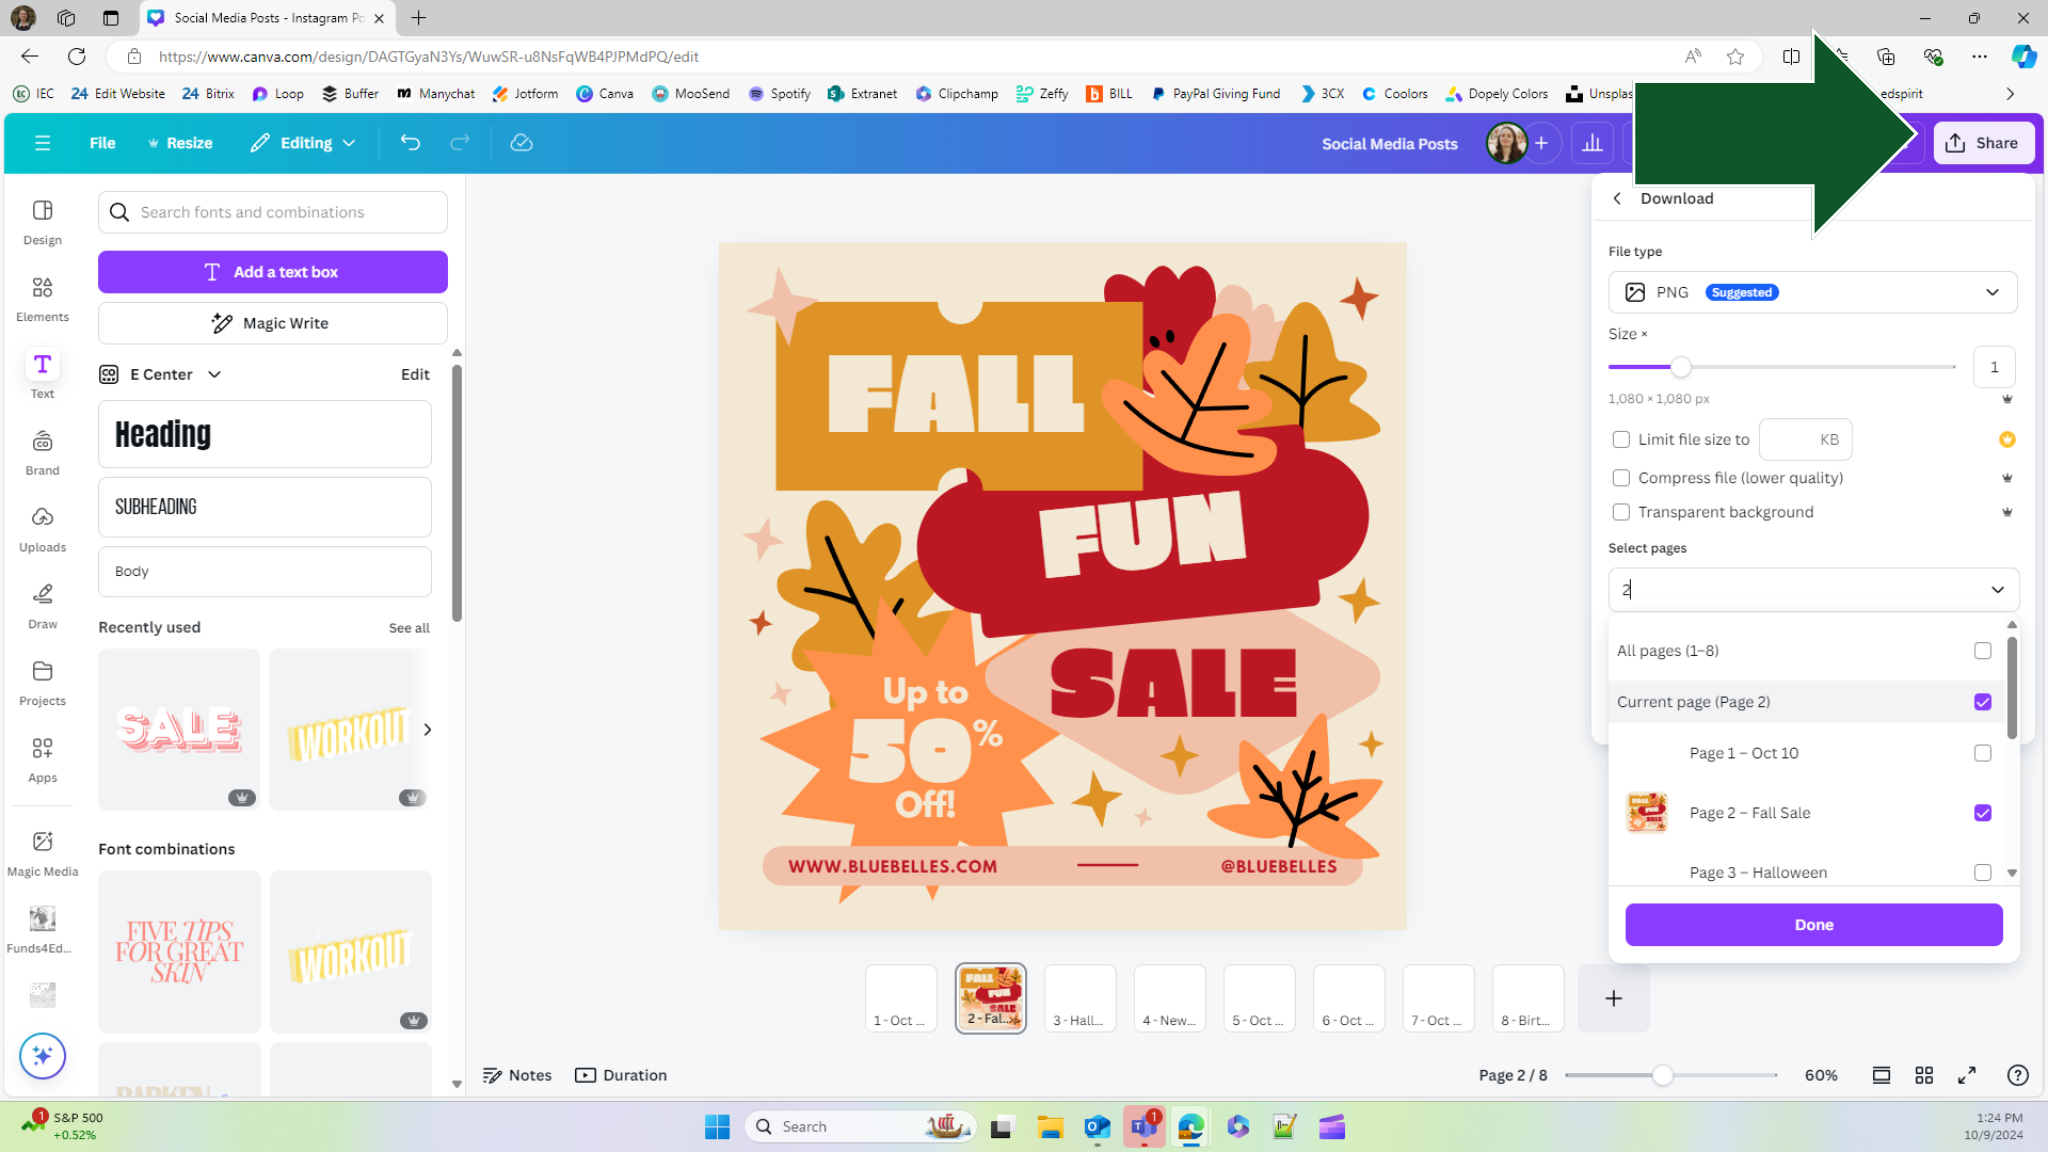
6. Download your post as an image.
In the upper right corner of the screen, there is a “Share” button. Once there, by selecting “Download,” users can choose the format and content to download. It is recommended to leave the size setting at 1 and specify the desired page to download. Otherwise, all pages will be downloaded, including those that may have already been used or posted, which may not be necessary.
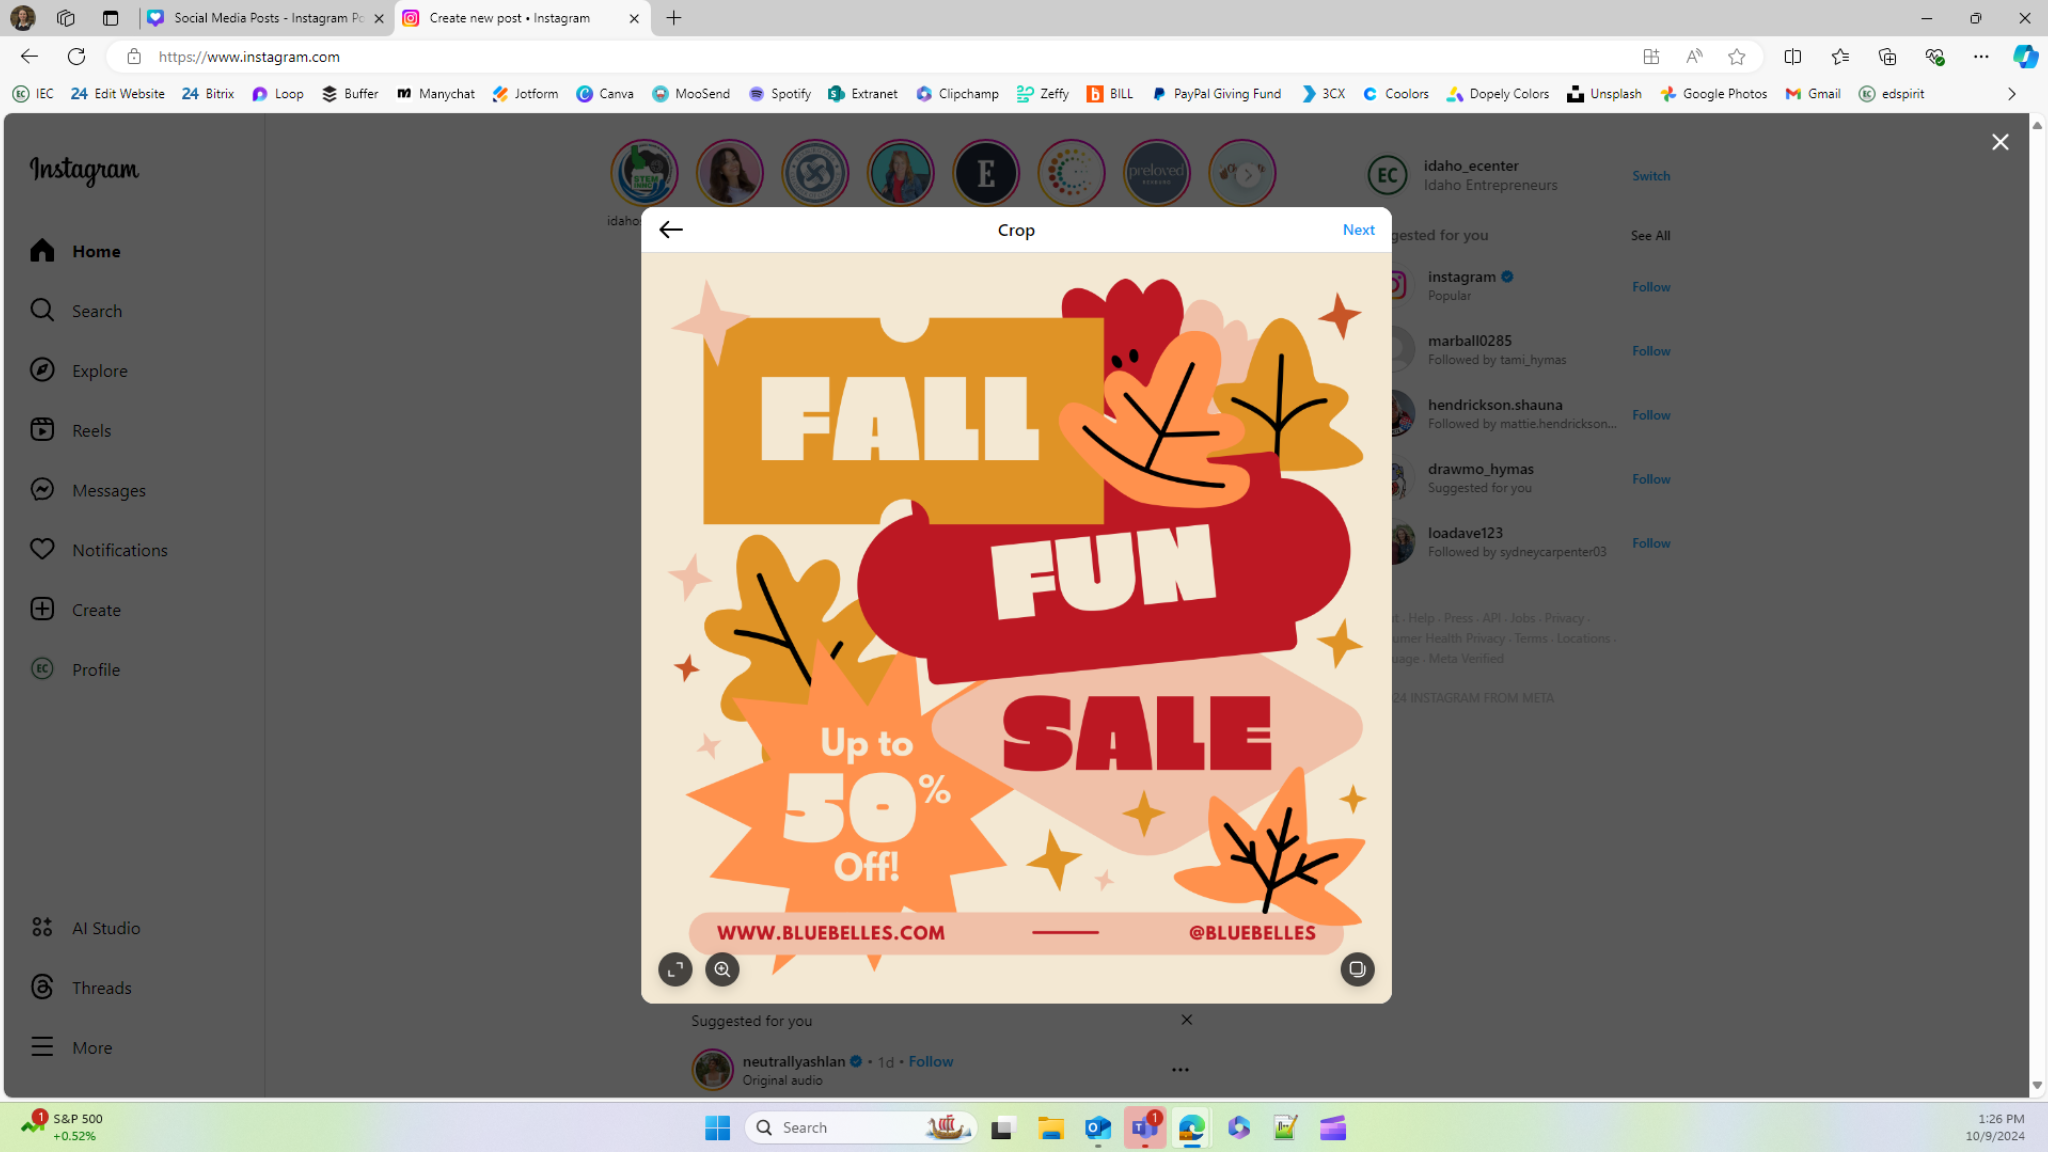
7. Post on your social media.
Address
35 N 1st E, Suite 3, Rexburg, ID 83440